
YUMI (Your Universal Multiboot Installer) is a tool used to create Bootable USB drives. Quickly create a Multiboot USB Flash Drive containing multiple Bootable ISO files. Use it to boot your favorite Live Linux Operating Systems, Linux and Windows Installers, antivirus utilities, disc cloning, backup, penetration testing, diagnostic tools, and much more. YUMI makes it easy for anyone to create their very own custom All-In-One Multi use diagnostic USB PC Repair Toolkit.
First Download YUMI Multiboot Creator from official website. You can follow this link to go to. Simply the best multiboot usb creator out there. Works perfectly on all machine i works on, either legacy BIOS, pure UEFI system or hybrid. One thing that do not work is when booted in 32-bit UEFI, after selecting the boot menu of WinPE, it shows the BCD menu of 64-bit entry.
It is amazing how easy it is today to Multiboot these 3 OS's on UEFI systems. Here is what you need: Here is how it goes: Create your USB installers and have them ready. Insert the OS X USB in a port and boot to the OS X installer. At the install screen, select Disk Utility. ID your drive: as you can see, this is an unititialized drive - no.
YUMI is the recommended successor to our Universal USB Installer and MultiBootISO tools. Contrary to our MultiBootISOs tool which used grub to boot ISO files directly from USB, YUMI uses syslinux to boot extracted distributions stored on the USB device. Then, reverts back to using grub to Boot Multiple ISO files from USB, when necessary.
A new USB multiboot solution (Legacy+Secure UEFI). Just copy the ISO files to the USB drive and boot. Supports.ISO,.IMG,.IMA,.VHD,.WIM, persistence and more. MultiBootUSB MultiBootUSB is a cross platform software written in python which allows you to install multiple live linux on a USB disk non destructively and option to uninstall distros. Try out the world's first true cross platform multi boot live usb creator for free.
Aside from a few distributions, all files are stored within the Multiboot folder, making for a nicely organized Portable Multiboot USB Drive that can still be used for other storage purposes.
Though YUMI was originally intended to be used to store and run various 'LIVE Linux' Operating Systems and tools from USB, Using YUMI to install Linux from USB to a Hard Drive works on many but not all distributions. (I'm working to address this). Moreover, if you find a distribution where the install does not work, please let me know.
YUMI Multiboot Bootable USB Flash Drive Creation
YUMI works much like Universal USB Installer, except it can be used to add more than one distribution to run Live from your Thumb Drive. USB Bootable Distributions can also be uninstalled using the same tool!
YUMI Main Multiboot USB Boot Menu
Legacy YUMI Download and Changelog:
Oct 23, 2020YUMI-2.0.7.6a.exe: * revision a – Fixed the broken YUMI Download link. Updated to support Ubuntu 20.10 Groovy Gorilla and derivatives. Changed System Rescue CD to System Rescue.
YUMI MD5: 989E53871CF58AF356E39830B9CA47AF
The following YUMI UEFI version is a work in progress that utilize GRUB2 for both UEFI and BIOS booting. Moreover, please NOTE that it is not backwards compatible with standard YUMI. Supported distributions are also limited, and your USB drive must be Fat32 formatted to support booting in UEFI mode. (Only BIOS mode will work with NTFS formatted drives).
YUMI UEFI Download and Changelog:
Oct 04, 2020YUMI-UEFI-0.0.2.8.exe: Updated to support Puppy Linux 9.5 (Fossapup64). Also fixed the broken CentOS 7 Live link.
YUMI UEFI MD5: C835597A8710C198DB5EA6FD58AD60FD
Important YUMI UEFI info: First, you'll need to disable secure boot (if it's enabled). Moreover, your drive must be Fat32 formatted if you want to UEFI boot.
Running YUMI from LINUX:WINE has previously worked for running YUMI from a Linux OS, with the exception of Fat32 Formatting the USB drive. See How To
IMPORTANT NOTES: Your USB drive must be Fat16/Fat32/NTFS formatted, otherwise Syslinux will fail and as a result, your drive will NOT Boot. NTFS may not work with every distribution but is required for storing files over 4GB. YUMI UEFI must use Fat32 format.
YUMI can be used to format your select USB drive, but be aware that all partitions on the selected drive will also be deleted. Ensure that you have made a backup of any information you want to keep before using YUMI on any drive.
Basic Essentials to create a MultiSystem Bootable USB Drive
- Fat32 or *NTFS Formatted USB Flash or USB Hard Drive
- PC that can boot from USB
- Windows Vista/7/8/10 or Linux/Mac OS with (WINE)
- YUMI-2.0.7.6a.exe
- Your selection of ISO Files
Please inform me of unlisted 'FREE' Live Linux distributions or version revisions, and I will attempt to update YUMI to support them, as I find time. Additionally, Bootable Software developers who wish to have their 'PAID' software added, can send me a copy to try.
YUMI UEFI Changelog
10/04/20 Version 0.0.2.8: Update to support Puppy Linux 9.5 (Fossapup64), and also Fixed broken CentOS 7 Live link.
09/01/20 Version 0.0.2.7: Update to support KDE Neon, and also newer Ubuntu Server 18.04 + 20.04.
08/05/20 Version 0.0.2.6: Update to support Endeavour OS, Bluestar, and also Cublinux. Fixed broken links for EasyPeasy, Avira Rescue CD, and also Xpud.
07/26/20 Version 0.0.2.5: Update to support LinuxFX (AKA: WindowsFX – which is also an Ubuntu Based variant that looks and feels much like Windows 10).
07/17/20 Version 0.0.2.4: Add support for Ubuntus' newer 'writable' casper persistence file label.
06/29/20 Version 0.0.2.3: Update to support Rescuezilla, Q4OS, and also POP!OS.
04/29/20 Version 0.0.2.2: Update to support Solus, Feren OS, and also Hiren's BootCD PE.
03/16/20 Version 0.0.2.1: Update to support Linux Mint Debian Edition, Manjaro 19.0x, and also the newer ESET Sysrescue CD.
Legacy YUMI Changelog
10/23/20 Version 2.0.7.6: Updated to support Ubuntu 20.10 Groovy Gorilla and derivatives. Also changed System Rescue CD to System Rescue.
10/05/20 Version 2.0.7.5: Update to support Puppy Linux 9.5 (Fossapup64), and also the newer Ultimate Boot CD.
08/04/20 Version 2.0.7.4: Update to support Endeavour OS. Also fixed broken links for Antergos, EasyPeasy, Xpud, Bluestar, and CubLinux.
07/26/20 Version 2.0.7.3: Update to support LinuxFX.
07/17/20 Version 2.0.7.2: Support Ubuntu's 'writable' casper persistence file label.
06/27/20 Version 2.0.7.1: Updated to support Q4OS, Rescuezilla, and also newer Memtest86+ 5.31. Corrected grub partition 4 Warning to read 'Fourth partition table entry is not empty'.
04/29/20 Version 2.0.7.0: Update to support booting Debian Live, Linux Mint, and also Linux Mint Debian Edition via NTFS using Grub Partition 4.
How to Create a MultiBoot USB Flash Drive (Windows)
- Run*YUMI-2.0.7.6a.exe following the onscreen instructions.
- Then, Run the tool again to Add More ISOs/Distributions to your Drive.
- Restart your PC. But be sure to set it to boot from the USB device.
- Select a distribution to launch. Then, boot and enjoy!
That's really all there is to it. If all went well, then you should be booting your favorite distributions from your custom Multi-Boot USB device!
Creating a MultiBoot USB Flash Drive (Linux)
The following instructions were performed from an Ubuntu 16.04 host environment.
NOTE: YUMI persistence option is currently broken when using YUMI-2.0.7.6a.exe within WINE. As a result, don't choose persistence and set the slider or the process will freeze while trying to build the persistent file and you will be forced to close YUMI.
I. Format your USB Flash Drive to use a Single Partition:
- Open a terminal and type
sudo su - Type
fdisk -l(and note which device is your USB Drive) - Type
fdisk /dev/sdx(replacing x with your actual usb device) - Type
d(to delete the existing partition) - Type
n(to create a new partition) - Type
p(for primary partition) - Type
1(to create the first partition) Press Enter(to use the first cylinder)Press Enteragain (to use the default value as the last cylinder)- Type
a(for active) - Type
1(to mark the first partition active 'bootable') - Type
t(for partition type) - Type
c(to use fat32 partition) - Type
w(to write the changes and close fdisk)
II. Create a Fat32 Filesystem on the USB Flash Drive:
- Type
umount /dev/sdx1(to unmount the mounted partition) - Type
mkfs.vfat -F 32 -n MULTIBOOT /dev/sdx1(to format the partition as fat32) - Remove and reinsert your USB flash drive, or remount it
III. Install WINE:
- To install WINE from within an Ubuntu operating environment, first open a terminal and type sudo apt install wine, then press enter. Once WINE is installed, launch YUMI as you normally would by simply clicking the YUMI-2.0.7.6a.exe
How YUMI Works
YUMI (Your Universal Multiboot Installer) enables each user to create their own custom Multiboot UFD containing only the distributions they want, in the order by which they are installed. A new distribution can be added to the UFD each time the tool is run.
If you run YUMI from the same location you store ISO files, then they should be auto detected (*See Known Issues Below), eliminating the need to browse for each ISO.
Other Notes: If MultibootISOs was previously used, you must reformat the drive, and start over. YUMI uses Syslinux directly, and chainloads to grub only if necessary, so it is not compatible with the older Multiboot ISO tool. Although I do plan to add back most of the capabilities of MultibootISOs as time permits.
Not all Unlisted ISO's can be booted (thus adding Unlisted ISOs is an UNSUPPORTED option).
YUMI can Create a Bootable UFD of the following distros/tools
— Debian Live 32/64 Bit —
- Debian Live
— Fedora 32/64 Bit —
- Fedora
— Linux Mint 32/64 Bit —
- Linux Mint
— OpenSUSE 32/64 Bit —
- OpenSUSE 32bit
- * OpenSUSE 64bit
— Puppy Linux 32/64 Bit —
- DPup Exprimo
- Fatdog64
- Lucid Puppy Linux
- Precise Puppy Linux
- Racy Puppy Linux
- Slacko Puppy
- Wary Puppy Linux
— Ubuntu 32/64 Bit —
- Ubuntu
- * Ubuntu Gnome
- ** Ubuntu Server Installer
- *** Ubuntu Secure Remix
- **** Ubuntu Studio
- Edubuntu
- Kubuntu
- Lubuntu
- Xubuntu
- Backbox
— Other Distros Alphabetical —
- Android-x86
- Antergos
- AntiX
- Archlinux
- Bodhi
- Bunsenlabs/Crunchbang
- CAELinux (Computer Aided Engineering)
- CentOS Live
- ChaletOS
- Damn Small Linux (DSL)
- Fuduntu
- gpxe (Net Bootable Distros)
- KNOPPIX
- KXStudio
- Mandriva
- Netrunner
- OSGeo Live
- PCLinuxOS
- Peppermint
- Peach OSI Linux
- Pear Linux
- Pinguy OS
- Porteus
- PureOS
- SalineOS
- Scientific Linux CERN
- Semplice Linux
- SLAX (Tiny Slackware Based Distro)
- Slitaz (Another Tiny Distro)
- Sparky Linux
- SolydX
- Sugar on a Stick
- System Rescue CD
- Tails (Anonymous Browsing)
- Liberte (Anonymous Browsing)
- Terralinux
- TinyCore (A Tiny Linux Distribution)
- Ultimate Edition 3
- XBMCbuntu
- Zorin OS Core
———— NetBook Distributions ————
- EasyPeasy (NetBook Distro)
- Jolicloud (NetBook Distro)
- Ubuntu Netbook Remix
- xPUD (Netbook Distro)
————— Antivirus Tools —————
- Acronis Antimalware CD
- AOSS (Malware Scanner) systemstage1
- AVG Rescue CD (Antivirus Scanner)
- AVIRA AntiVir Rescue CD (Virus Scanner) ; does install to root of drive
- BROKEN!
Bitdefender Rescue Disk (Antivirus Scanner) - Comodo Rescue Disk (Antivirus Scanner)
- Dr.Web Live CD ; does install to root
- F-Secure Rescue CD
- GDATA Rescue CD
- Kaspersky Rescue Disk (Antivirus Scanner)
- Panda SafeCD
- Windows Defender Offline
—————– System Tools —————-
- Acronis True Image
- BackBox (Penetration Testing)
- BackTrack5 (Penetration Testing)
- Boot Repair Disk
- Clonezilla (Backup + Clone Tool)
- DBAN (Hard Drive Nuker)
- Deft (Forensics)
- DRBL (Diskless Remote Boot in Linux)
- EASEUS Disk Copy (Disk Cloning Tool)
- FreeDOS (Balder img)
- GParted (Partition Tools)
- GRML (system rescue)
- HDT (Hardware Detection Tool)
- Kali (Penetration Testing)
- Memtest86+ (Memory Testing Tool)
- Matriux (Penetration Testing)
- Offline NT Password & Registry Editor
- Ophcrack (Password Finder)
- Parted Magic (Partition Tools)
- PING (Partimg Is Not Ghost)
- Partition Wizard (Partition Tools)
- Rescatux
- Redo Backup And Recovery (Recovery Tools)
- Rip Linux (Recovery Distro)
- Trinity Rescue Kit ; does install to root of drive
- Ultimate Boot CD (Diagnostics Tools)
- Web Converger (Web Kiosk)
- WifiSlax
Multiboot Usb Uefi
- —————– Other OS/Tools —————-
- Linux Live Tools for OCZ
- Hiren's Boot CD ; does install to root of drive
- Falcon 4 Boot CD ; does install to root of drive
- Kon-Boot Floppy Image
- Windows Vista/7/8/10 Installer
- Windows XP Installer
—————– Bootable ISOs —————-
- Try an Unlisted ISO (SYSLINUX)
- * Try an Unlisted ISO (GRUB)
- ** Try an Unlisted ISO (GRUB Run from RAM)
YUMI Troubleshooting, Known Issues, Bugs
NOW FIXED in the latest YUMI revision. – casper-rw Persistence is not currently working with Ubuntu-20.04 and variants due to an upstream filename requirement change. To fix the persistent feature, simply rename the 'casper-rw' file to 'writable' but without the quotes. This file can be found on your YUMI USB drive in folder I.E. /Multiboot/Ubuntu-20.04-desktop-amd64.
The Persistence feature is currently broken with Newer Debian based distributions due to significant changes upstream. Debian now requires the persistent block file and label to be named persistence instead of live-rw, and it must hold a persistence.conf file containing / Union. I am hoping to make the necessary changes and provide a fix soon.
If you encounter a message stating
An error (1) occurred while executing syslinux. Your USB drive won't be bootable.
Make sure your USB drive is formatted using a Fat32 or NTFS partition with an MBR (Master Boot Record). An exFAT formatted Partition will not work. GPT (GUID Partition Table) Fat32 or NTFS Partitions are also not currently supported.
If you encounter a message stating
Insane primary (MBR) partition. Can’t find myself on the drive I booted from
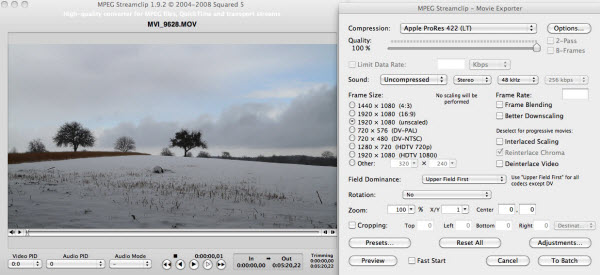 While, the following paragraphs will explain in detail how to convert AVI to MP4 on Mac. You might also want MP4 files instead of AVI due to a good compression rate and the final quality. Do you have some AVI (Audio Video Interleave) files on your Mac which you want to convert to MP4? Mac’s default video player lacks support for.avi files, so do many other players and devices.
First, replace your chain.c32 file located at multiboot/chain.c32 with (you'll need to unzip the file) -> This zipped chain c32 File
If replacing the chain.c32 file does not fix the problem, your USB drive may be improperly formatted, contains more than one partition or MBR, or your BIOS is not properly detecting the USB drive as USB-HDD, and/or its firmware needs to be updated. You can try these methods to Format and Restore your USB Drive
Windows to Go/Installers – Options Explained
The Windows to Go option creates a VHD file that is 20GB in size. As such, it requires the drive to be formatted NTFS. Fat32 cannot support a file more than 4GB in size. Many flash drives you might find at local department stores won't be fast enough. You'll need a Very Fast Flash Drive. When Windows boots from the USB for the first time, it'll go through the setup process and then reboot. You'll need to boot using your Windows to Go menu option a second time to finalize the setup process and finally boot into your full Portable Windows.
The Single Windows Installer/PE options are most likely to work for both stock and modified ISO files. When using it, you are limited to storing one Windows Installer per USB drive (I.E. one Win XP and one Win Vista 7 or 10). The Multiple Windows Installer/PE options allow for storing more than one stock Windows Installer per drive. Generally, only unmodified Windows ISO files will work with this option.
-wimboot option stores the extracted Multi Windows Installers in their own directory. -bootmgr option moves the bootmgr and bcd files to root of drive. (note: -bootmgr option does require a Windows Vista or later host to run bcdedit).
Traditional YUMI is not natively UEFI capable. However, it is possible to boot and run your Windows Installers from UEFI. To switch between added Windows versions, navigate to the multiboot/win-directory (replacing win-directory with the Windows version you want to boot) on your USB. Once there, move the bootmgr, bootmgr.efi, and entire boot folder to the root of your USB drive. Then reboot, booting your computer from the UEFI compatible USB. If all went well, it should boot straight into your chosen Windows Installer.
Try an Unlisted ISO – Options Explained
- Try Unlisted ISO (Grub Partition 4) – This boot option will attempt to boot the ISO file using Grub. Additionally it adds a 4th partition table to the USB device and uses this as a placeholder for the ISO. This option has been shown to successfully boot almost all Linux based distributions.
- Try Unlisted ISO (Grub) – Same as boot option 1, but attempts to boot the ISO without using a 4th partition as a placeholder for the ISO.
- Try Unlisted ISO (Grub From RAM) – Same as boot option 2, but attempts to store the ISO in system memory and boot it from there. Useful for cases where the ISO is small, and you'd like to boot the OS and then move the USB to different machines and subsequently boot the OS from them as well.
- Try Unlisted ISO (via Syslinux) – The original default YUMI supported boot option. Syslinux works to boot many distributions, but not all.
Multiboot folder and volume name.
YUMI attempts to store most added distributions within the multiboot folder. This is also the root directory set for syslinux. In some cases, YUMI also expects the Volume Label of your USB drive to be MULTIBOOT in order for OpenSUSE, CentOS and several other distributions to boot. YUMI will attempt to automatically create this Volume Label, however it can sometimes fail. So please ensure that the Volume Label of your USB remains MULTIBOOT if you expect your distributions to boot.
Xcode for mac mini. When booting linux distributions from some laptops such as the Lenovo Yoga with a touchscreen, the acpi=off boot parameter might be necessary in order to successfully boot.
My PC wont Boot from my Flash Drive, but BIOS supports USB boot!
Some Flash Drives ship formatted (without a partition), as a result, YUMI requires the drive to contain a partition with a MBR (Master Boot Record). To ensure compatibility, you can use YUMI to format your device as NTFS or Fat32.
How to force a rebuild of the Syslinux MBR:
This is useful if your YUMI prepared USB drive is somehow no longer bootable.
For Newest version of YUMI:
From the multiboot folder on your flash drive, delete the hidden file ldlinux.sys and then rename the libcom32.c32 file to _libcom32.c32. Then use YUMI to install any menu item. YUMI will notice that the file is missing and will attempt to reinstall syslinux and repair the master boot record. Once finished, rename _libcom32.c32 back to libcom32.c32.
For Older versions of YUMI:
Delete the hidden ldlinux.sys file from the multiboot folder, and then use YUMI to install any menu item. YUMI should notice that this file is missing and will attempt to repair it.
Other Known Issues:
TAILS – If your USB is detected as a 'fixed' hard drive and not a 'removable' disk, (a few Sandisk drives have the removable bit flipped this way), you'll have to remove occurrences of the boot parameter 'live-media=removable' from the Live64.cfg file found at 'multiboottails-amd64-3.3EFIBOOT' or consequently TAILS will fail to find the live filesystem.
The files for Flacon 4, Hiren's Boot CD, Trinity Rescue Kit, Backtrack, Avira Antivir, and Dr.Web Live are all stored outside of the multiboot folder. Most other distribution files remain contained within the multiboot folder. I am open to a simple working solution!
YUMI supports Windows XP Install from USB via ISO. In order for the Windows XP installation to succeed, you must perform the following steps;
1.) To begin an install, select (Stage 1)
2.) Upon first reboot, you must select (Stage 2)
3.) Finally, after (Stage 2) is complete – upon the second reboot, select (Stage 3) to boot the drive where you installed Windows XP. If this option fails, simply remove the USB and reboot!
* YUMI does support NTFS, however not all distributions will boot from an NTFS formatted device. NTFS is required for Windows to Go and distributions containing files over 4GB.
Troubleshooting Boot Errors:
While trying to run an ISO from USB, If you get a Boot error saying:
Error 60: File for drive emulation must be in one contiguous disk area
You'll need to defragment your ISO using one of the following tools:
contig – Command line tool used to defragment ISO files.
wincontig – GUI tool used to defragment ISO files.
Additional Notes:
When using Legacy YUMI, any non-booting or broken menu entries for ISO files added via the 'Try an Unlisted ISO (GRUB)' options, can be fixed by editing each corresponding entry in multibootmenumenu.lst
If you don't have a floppy drive and get fd0 errors while booting, simply add floppy.allowed_drive_mask=0 to the append line for the troubled entry. Although the best fix is to simply disable floppy in BIOS.
Persistently Saving Changes: YUMI currently enables the casper-rw persistence feature for some (but not all) Ubuntu based distributions. Yes, you can also have multiple persistent distributions, as each distro utilizes its own casper-rw file. * Persistence will NOT work on NTFS formatted USB drives. Additionally, some distributions will not even boot via NTFS!
Ophcrack Tables. In order to load Ophcrack tables, the tables folder needs to exist at the root directory of the USB device; (example F:tablesvista_free). You can Get Ophcrack Tables from the Official Ophcrack site. Once downloaded, simply unzip them to the root of your USB. Because you're using this method, you can have your Windows XP and Vista/7/10 tables all working together on the same device.
YUMI on Linux: You can run YUMI on a Linux Host via WINE. Wine is currently untested, and possibly broken, because YUMI requires (Root) permissions to modify the boot sector of a device. Please do let me know if you find success running YUMI from Wine so I can update this section accordingly.
YUMI – Multiboot USB Creator published under Bootable USB Creator Software
Mac Create Bootable Usb From Iso
- Products ▼
- For Windows
- Android Manager for Win
- Android Data Recovery
- Phone Transfer for Win
- Android Root Pro
- For Mac
- Android Manager for Mac
- Android Data Recovery Mac
- Phone Transfer for Mac
- More >>>

A dual boot Windows PC containing Windows 10 and macOS is not that hard to create. Fondly called a Hackintosh, such a setup allows you to enjoy the best of both operating systems on a single computer, hence the phrase dual boot. One of the biggest reasons that people want to create Hackintoshes is that they have the freedom to choose from two different desktop app sources. On a dual boot, you can enjoy popular Windows applications from the Microsoft Store as well as the best nuggets from the Mac App Store - all on a single computer.
The easiest way to do this is to get a Windows 10 PC and then partition the drive so you can install macOS on that partition. Each OS requires its own partition or its own drive. In this article, we'll show you how to create a partition and install the Mac operating system alongside the existing copy of Windows 10 on your PC.
Currently this tutorial is applied to macOS Mojave and High Serria, Mac OS X Serria, EI Capitan and Yosemite
Preparations before Making a Dual Bootable (Win 10 & macOS) PC
There are a few things to keep in mind at this point. First, you don't need a secondary drive to do this. The shared drive method of dual booting will work just fine as long as you have enough space on the disk for an additional partition for your copy of macOS.
The second requirement is that the disk needS to be already partitioned as GUID Partition Table, or GPT. Otherwise, you will need to first delete Windows, install macOS after formatting the disk, and then install Windows 10 at the end. The reason Windows 10 comes last is that certain errors might occur if you try installing Windows first.
P.S if the current OS is not Windows 10, then you have to create a bootable Windows 10 USB and install it on the computer first.
Third, you will need to create a macOS USB installer before attempting the dual boot. You can do this on a Mac by getting the installation files via the App Store and then burning the DMG file inside to a USB drive using Disk Utility app.

Best Multiboot Usb Software
Dual Boot Windows 10 and Mac OS on PC without Erasing Windows
To start off, you will need a disk partition utility to help you allocate the required space. A free tool like MiniTool Partition Wizard Free Edition is more than adequate. Once you have the software, follow the steps shown below.

Step 1: Launch MiniTool Partition Wizard and look for the EFI system partition. If not EFI partion found, then create a new partition with GPT.
Step 2: If the EFI partition is less than 200MB, you will need to expand it by taking space from the partition before or after it. This is usually the case when the disk is formatted for Windows, which only allocates 100MB for the EFI partition. You can right-click on the partition to resize it.
Step 3: Now right-click on the new partition and select Split to create a new partition for the macOS installation. The size can be specified on this page. Click OK to apply the changes.
Step 4: The next step is to format this partition. To do this, right-click on the macOS partition and select Format. Set the file system to FAT32 and confirm by clicking OK.
Step 5: You will now need to boot your PC from the macOS USB installer. In Windows, you can do this by hitting the F2 during the startup process. This takes you to the BIOS Setup Utility, where you can change the boot priority so the computer boots from your macOS USB installer instead of the existing Windows files. Once the PC boots up from the installer, open Disk Utility from Applications >Utilities. Select the partition inside Disk Utility and hit Erase. Set the format to APFS (macOS High Serria and Mojave) or Mac OS Extended (journaled) for OS X 10.12 and below. After that, click the Erase button to start the partition process.
Step 6: The next thing is to merge the EFI folders from Windows EFI boot drive and the USB installer, and for this, you can use an EFI mounter like Clover Configurator. The purpose of this step is so that your macOS can boot from the partition instead of from the USB installer.
Step 7: Restart Windows 10 PC and boot from macOS install USB. Follow the prompt to start the macOS installation process.
Usb Multiboot For Mac Iso
Step 8: There's still one more step required to make sure the dual-booting works, and that is to modify one single file so that both partitions are visible as boot sources. This is important because, otherwise, you will have to boot to macOS from the installer each time, which is a complex and unnecessary task. The steps in the image below show you how it's done:
Step 9 : The final step, which is optional, will make your computer boot into Clover instead of Windows. This allows you to choose which OS to boot into, and it's a very convenient thing to set up. You can also do this when your drive name fails to show up despite following Step 6. See the steps shown in the image below.
The process is now complete. When you restart your PC, you will see two boot options in the Clover interface - one for Windows and one for macOS. Select the OS you want to work on and resume the boot process. You will need to restart to access the other OS, which is a minor inconvenience, but that's a trade-off you're going to have to be willing to make if you want a dual boot computer with both Windows 10 and macOS.
Another way is to use separate drives so each OS has its own drive and own EFI system partition. This can be done when your original Windows drive is not formatted for GPT. If it is, then you can follow the steps described in this article to do a dual-boot on a shared drive.
Related Articles

- Windows 10 Password Crack | Remove Windows Admin Password | Change Windows Password | Bootable Windows USB | ISO to USB Tool | Create Windows Reset Disk | Burn ISO to CD | Create Windows Reset Disk | More>>>